Ever dreamt of effortlessly creating luscious lattes, creamy cappuccinos, or velvety flat whites right in your own kitchen? The Nespresso Aeroccino 3 Milk Frother is designed to turn that dream into a delicious reality. This compact and elegant device has become a staple for coffee lovers seeking to elevate their home brewing experience without the complexity of a traditional espresso machine steam wand. Forget tedious whisking or uneven results; the Nespresso Aeroccino 3 promises a world of perfectly frothed milk at the touch of a button.
What exactly is this magic little gadget, and why has it captured the hearts of so many? At its core, the Nespresso Aeroccino 3 milk frother is an automatic milk frother designed for simplicity and efficiency. It takes the guesswork out of frothing, consistently delivering milk that’s just right for your favorite beverages. It’s an essential tool for anyone who enjoys milk-based coffee drinks but doesn’t want to invest in a full-sized espresso machine or struggle with manual frothing techniques. The beauty of the Nespresso Aeroccino 3 lies in its ability to heat and froth milk to ideal temperatures and textures, allowing you to easily replicate your coffee shop favorites.
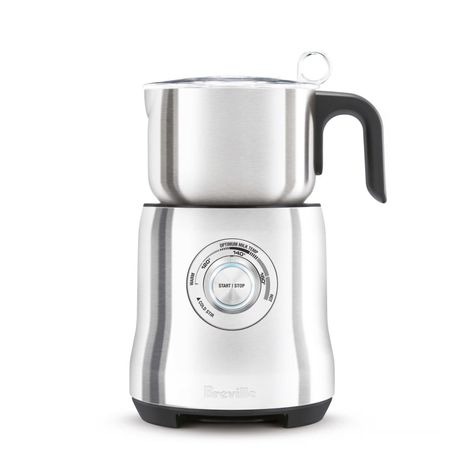
Unpacking the Nespresso Aeroccino 3: Features and Technology
The Nespresso Aeroccino 3 milk frother boasts a sleek, minimalist design that fits seamlessly into any kitchen aesthetic. Its ribbed plastic housing gives it a modern, sophisticated look, while its compact size ensures it doesn’t hog precious counter space. But beyond its good looks, what makes this frother tick?
At the heart of the Nespresso Aeroccino 3 is its intelligent one-touch operation. With a single button, you can choose between hot milk foam, hot milk, or cold froth. A quick press for approximately one second will yield hot frothed milk or just hot milk, while holding the button for two seconds activates the cold frothing function. This intuitive control makes it incredibly user-friendly, even during those hazy morning hours.
Inside the frother, a magnetic whisk silently spins, transforming liquid milk into a cloud of creamy foam. The device is designed to heat milk quickly, typically reaching temperatures between 160-170 degrees Fahrenheit (approximately 70-77 degrees Celsius) in about 60-80 seconds for hot milk, and around a minute for frothed milk. This rapid heating and frothing mean you’re never far from your perfect cup. It also features an automatic shut-off function, ensuring safety and preventing milk from overheating or burning. The non-stick interior further simplifies both the frothing process and subsequent cleaning.
“The Aeroccino 3 is a marvel of simplicity,” says avid home barista, Evelyn Reed. “It consistently delivers velvety foam, making my morning cappuccino a true delight. You just pour the milk, press a button, and it does all the hard work for you.”
Getting Started: A Detailed Guide to Using Your Nespresso Aeroccino 3
Using your Nespresso Aeroccino 3 milk frother is incredibly straightforward, but a few tips can help you achieve optimal results every time.
First-Time Setup
- Unbox and Clean: Before its first use, remove all packaging and gently clean the interior of the frother, the whisk, and the lid with warm, soapy water. Rinse thoroughly and dry completely.
- Attach the Whisk: The Aeroccino 3 comes with a small whisk, which is magnetically held in place at the bottom of the pitcher. For frothy milk, ensure the spring attachment is on the whisk. If you only want hot milk without froth (e.g., for a flat white or hot chocolate), you can remove the spring from the whisk.
- Place on Base: Set the frother jug onto its slimline power base.
Frothing and Heating Milk
- Add Milk: Pour cold fresh milk into the Nespresso Aeroccino 3. There are clear fill lines inside the frother. For frothed milk, fill to the lower “Max Foam” line (typically around 4.1 oz/120 ml). For hot milk without froth, fill to the higher “Max Hot Milk” line (around 8.1 oz/240 ml). Using whole milk generally produces the best, most voluminous froth, though oat, soy, and almond milk can also yield decent results.
- Select Your Setting:
- For Hot Froth/Hot Milk: Press the button on the front of the unit for approximately one second. The button will illuminate red, indicating it’s heating.
- For Cold Froth: Hold the button down for about two seconds until it illuminates blue. This signals the cold frothing cycle.
- Wait for Perfection: The Nespresso Aeroccino 3 will operate quietly and automatically shut off when your milk is ready. This usually takes between 60 to 80 seconds.
- Pour and Enjoy: Once complete, gently remove the lid and pour your perfectly frothed or heated milk into your coffee. Many users find it helpful to use a spoon to hold back the thicker foam if they desire more hot milk first, then spoon the foam on top.
Mastering the Art of Perfect Milk Froth
While the Nespresso Aeroccino 3 makes frothing easy, a few expert techniques can help you consistently achieve cafe-quality results.
Choosing the Right Milk
The type of milk you use significantly impacts the froth quality.
- Whole Milk: Often considered the gold standard, whole milk’s fat content creates a rich, creamy, and stable foam.
- 2% Milk: A good balance of creaminess and lightness, producing a satisfying froth.
- Skim Milk: Tends to produce a lighter, airier foam with larger bubbles, which can dissipate more quickly.
- Non-Dairy Milks: Many plant-based milks, especially barista-blend oat or almond milks, are formulated to froth well. Experiment to find your favorite, as results can vary by brand. “I’ve found organic 2% milk creates the most voluminous foam in my Aeroccino 3,” notes a satisfied user, highlighting that organic dairy often froths better.
Temperature is Key
The Aeroccino 3 is designed to heat milk to an optimal temperature for drinking, usually between 160-170°F (70-77°C). This temperature is ideal for enhancing the sweetness of the milk without scalding it.
The Pouring Technique
For truly artful drinks, the way you pour matters. After frothing, gently swirl the Nespresso Aeroccino 3 to integrate any thicker foam with the underlying hot milk. This creates a more uniform, glossy texture. Then, pour steadily into your espresso. For cappuccinos, you might pour a small amount of hot milk first, then spoon the thick foam on top. For lattes, aim for a continuous pour that gradually brings the microfoam to the surface.
Nespresso Aeroccino 3 vs. The Competition: What Sets It Apart?
In a market brimming with milk frothers, how does the Nespresso Aeroccino 3 milk frother hold its own? While newer models like the Aeroccino 4 offer additional settings and a different design, the Aeroccino 3 remains a popular choice for its balance of simplicity, efficiency, and consistent performance.
Simplicity vs. Versatility
The Nespresso Aeroccino 3 excels in its straightforward, one-button operation for hot froth, hot milk, and cold froth. The Aeroccino 4, while a great option, introduces more specific settings (e.g., dedicated buttons for latte and cappuccino foam), and a more ergonomic handle and spout, which can be appealing for those desiring more control or specific foam textures. However, if your preference is for a no-fuss experience that delivers excellent results, the Aeroccino 3 is a strong contender.
Design and Build
The Aeroccino 3 features a sleek, cylindrical design with a ribbed, rubberized finish that’s easy to grip and resists fingerprints. It’s also quite compact. The Aeroccino 4 has a more jug-like design with a handle, offering a different aesthetic and potentially easier pouring for some users. Both are well-built, often featuring stainless steel interiors and durable plastic exteriors.
Price Point
Generally, the Nespresso Aeroccino 3 milk frother is positioned as a more affordable option compared to the Aeroccino 4 or the more advanced Nespresso Barista Recipe Maker. This makes it an excellent entry point for those looking to upgrade their home coffee game without a significant investment.
Keeping Your Nespresso Aeroccino 3 Pristine: Maintenance and Cleaning
Proper cleaning is vital to ensure the longevity and optimal performance of your Nespresso Aeroccino 3 milk frother. Fortunately, its non-stick interior makes cleanup a breeze.
Daily Cleaning
- Rinse Immediately: The golden rule for any milk frother is to clean it immediately after use. This prevents milk residue from drying and sticking to the non-stick coating.
- Hand Wash Only: The Nespresso Aeroccino 3 is not dishwasher safe. Separate the jug from its base. Remove the lid, the seal from the lid, the whisk, and the spring from the whisk.
- Gentle Cleaning: Wash the inner jug, lid, whisk, and spring with warm, soapy water and a soft sponge or cloth. Avoid abrasive materials that could damage the non-stick coating.
- Rinse and Dry: Rinse all parts thoroughly with cold water. Dry everything with a clean towel before reassembling. It’s important not to immerse the entire frother jug in water, especially the base where the electrical connections are.
“I always make sure to rinse my Aeroccino 3 right after I pour my coffee,” advises Mark Jensen, a barista with years of experience. “That way, a quick wipe with soap and water is all it needs, keeping it looking and working like new.”
Preventing Burnt Milk Spots
Burnt milk spots are usually a sign of milk residue being heated multiple times without proper cleaning. If you plan to make several drinks in a row, a quick rinse with cold water between uses can help prevent this. For stubborn spots, a mixture of baking soda and water left to soak for a short period can help, followed by gentle scrubbing.
Smart Shopping: Tips for Choosing the Right Nespresso Aeroccino 3 Milk Frother
When you’re ready to bring the Nespresso Aeroccino 3 milk frother into your home, consider these tips to ensure you make the best choice.
- Understand Your Needs: Are you looking for a simple, reliable frother for daily cappuccinos and lattes? Or do you crave more advanced features and multiple foam textures? The Aeroccino 3 is perfect for the former, prioritizing ease of use and consistent results.
- Consider Your Milk Preferences: While the Nespresso Aeroccino 3 works well with most milk types, if you exclusively use specific non-dairy milks, you might want to read user reviews specific to those milks.
- Space and Aesthetics: Its compact, sleek design is a major selling point. Ensure it fits your kitchen counter space and complements your existing appliances.
- Read Reviews: While this article provides a comprehensive overview, checking recent user reviews can offer insights into long-term durability and specific user experiences.
- Check for Bundles: Sometimes, Nespresso offers the Aeroccino 3 as part of a bundle with their coffee machines, which can be a cost-effective way to get both.
Frequently Asked Questions About the Nespresso Aeroccino 3 Milk Frother
1. What types of drinks can I make with the Nespresso Aeroccino 3?
The Nespresso Aeroccino 3 milk frother is perfect for a wide range of milk-based coffee drinks, including cappuccinos, lattes, macchiatos, and even iced lattes or iced cappuccinos using its cold froth function. You can also use it to simply heat milk for hot chocolate or a cafe au lait.
2. Can I use non-dairy milk in the Nespresso Aeroccino 3?
Yes, you can use various non-dairy milks such as oat, almond, and soy milk in the Nespresso Aeroccino 3. Barista-style plant-based milks often yield the best frothing results due to their optimized protein and fat content.
3. Is the Nespresso Aeroccino 3 dishwasher safe?
No, the Nespresso Aeroccino 3 milk frother is not dishwasher safe. The jug, lid, whisk, and spring should be hand-washed immediately after each use with warm, soapy water and a soft cloth, then rinsed and dried thoroughly.
4. How long does it take for the Nespresso Aeroccino 3 to froth milk?
The Nespresso Aeroccino 3 is remarkably fast, typically frothing hot milk in about 60 to 70 seconds and cold milk in around 90 seconds. Heating milk without frothing usually takes about 80 seconds.
5. What is the capacity of the Nespresso Aeroccino 3?
The Nespresso Aeroccino 3 milk frother has a maximum capacity of 4.1 ounces (120 ml) for milk froth and 8.1 ounces (240 ml) for hot milk without froth. This is generally sufficient for one to two servings, depending on the drink size.
Elevate Your Coffee Ritual
The Nespresso Aeroccino 3 milk frother is more than just an appliance; it’s an invitation to explore the delightful world of milk-based coffee drinks from the comfort of your home. Its effortless operation, consistent performance, and compact design make it an invaluable tool for both novice and experienced coffee enthusiasts. By understanding its features, mastering simple usage techniques, and maintaining it properly, you can unlock a universe of creamy textures and rich flavors. So go ahead, experiment with different milks and recipes, and transform your daily coffee ritual into an indulgent cafe-like experience, all thanks to your Nespresso Aeroccino 3.